GNU Privacy Guard
To protect messages that you send by email, most Linux distributions provide GNU Privacy Guard (GnuPG) encryption and authentication (gnupg.org). GnuPG is the GNU open source software that works much like PGP encryption. It is the OpenPGP encryption and signing tool (OpenPGP is the open source version of PGP). With GnuPG, you can both encrypt your messages and digitally sign them—protecting the message and authenticating that it is from you. Currently, Evolution and KMail both support GnuPG encryption and authentication, along with Thunderbird with added GPG extensions. On Evolution, you can select PGP encryption and signatures from the Security menu to use GnuPG (the PGP options use GnuPG). On KMail, you can select the encryption to use on the Security panel in the Options window. For Thunderbird, you can use the enigmail extension to support OpenGPG and PGP encryption (enigmail.mozdev.org).
GnuPG operations are carried out with the gpg command, which uses both commands and options to perform tasks.
The first time you use gpg, a .gnugpg directory is created in your home directory with a file named options. The .gnugpg/gpg.conf file contains commented default options for GPG operations. You can edit this file and uncomment or change any default options you want implemented for GPG. You can use a different options file by specifying it with the --options parameter when invoking gpg. Helpful options include keyserver entries. The .gnugpg directory will also hold encryption files such as secring.gpg for your secret keys (secret keyring), pubring.gpg for your public keys (public keyring), and trustdb.gpg, which is a database for trusted keys.
GnuPG Setup: gpg
Before you can use GnuPG, you will have to generate your private and public keys. On the command line (terminal window), enter the gpg command with the --gen-key command. The gpg program will then prompt with different options for creating your private and public keys. You can check the gpg Man page for information on using the gpg program.
gpg --gen-key
Creating Your Key
You are first asked to select the kind of key you want. Normally, you just select the default entry, which you can do by pressing the ENTER key. Then you choose the key size, usually the default, 1024. You then specify how long the key is to be valid—usually, there is no expiration. You will be asked to enter a user ID, a comment, and an email address. Press ENTER to be prompted for each in turn. These elements, any of which can be used as the key’s name, identify the key. You use the key name when performing certain GPG tasks such as signing a key or creating a revocation certificate. For example, the following elements create a key for the user rahul with the comment “hi rahul this is gpg key” and the email address rahul.mahale123@gmail.com:
"rahul (hi rahul this is gpg key) <rahul.mahale123@gmail.com>"
You can use any unique part of a key’s identity to reference that key. For example, the string “rahul” would reference the preceding key, provided there are no other keys that have the string “rahul” in them. The string “rahul” would also reference the key, as would “hi rahul this is gpg key”. Where a string matches more than one key, all those matched would be referenced.
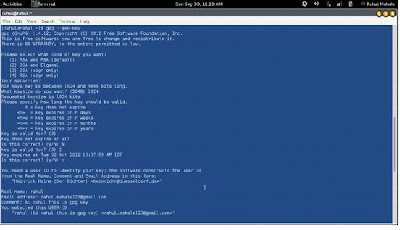 |
| Generating key with gpg |
Protecting Your Key
The gpg program will then ask you to enter a passphrase, used to protect your private key. Be sure to use a real phrase, including spaces, not just a password. gpg then generates your public and private keys and places them in the .gnupg directory. The private keys are kept in a file called secring.gpg in your .gnupg directory. The public key is placed in the pubring.gpg file, to which you can add the public keys of other users. You can list these keys with the --list-keys command.
In case you later need to change your keys, you can create a revocation certificate to notify others that the public key is no longer valid. For example, if you forget your password or someone else discovers it, you can use the revocation certificate to tell others that your public key should no longer be used. In the next example, the user creates a revocation certificate for the key rahul and places it in the file myrevoke.asc:
gpg --output myrevoke.asc --gen-revoke rahul
Making Your Public Key Available
For other users to decrypt your messages, you have to make your public key available to them. They, in turn, have to send you their public keys so that you can decrypt any messages you receive from them. In effect, enabling encrypted communications between users involves all of them exchanging their public keys. The public keys then have to be verified and signed by each user that receives them. The public keys can then be trusted to safely decrypt messages. If you are sending messages to just a few users, you can manually email them your public key. For general public use, you can post your public key on a keyserver, which anyone can then download and use to decrypt any message they receive from you. A keyserver can accessed using email, LDAP, or the HTTP Horwitz Keyserver Protocol (HKP). The OpenPGP Public Keyserver project is located at pks.sourceforge.net. Several public keyservers are available. kp://subkeys.pgp.net is listed in your .gnupg/gpg.conf file, though commented out. You can send directly to the keyserver with the –keyserver option and --send-key command. The --send-key command takes as its argument your email address. You need to send to only one keyserver, as it will share your key with other keyservers automatically.
gpg --keyserver search.keyserver.net --send-key example@redifmail.com
If you want to send your key directly to another user, you should generate an armored text version of the key that you can then email. You do this with the --armor and –export options, using the --output option to specify a file to place the key in. The --armor option will generate an ASCII text version of the encrypted file so that it can be emailed directly, instead of as an attached binary. Files that hold an ASCII-encoded version of the encryption normally have the extension .asc, by convention. Binary encrypted files normally use the extension .gpg. You can then email the file to users you want to send encrypted messages to.
# gpg --armor --export rahul.mahale123@gmail.com --output rahul.mahale123.asc
# mail -s 'mypubkey' rahulrmahale@yahoo.com < rahul.mahale123.asc
Many companies and institutions post their public key files on their websites, where they can be downloaded and used to verify encrypted software downloads or official announcements.
Obtaining Public Keys
To decode messages from other users, you will need to have their public keys. Either they can send them to you or you can download them from a keyserver. Save the message or web page containing the public key to a file. You will then need to import, verify, and sign the key. Use the file you received to import the public key to your pubring file. In the following example, the user imports rahulrmahale’s public key, which he has received as the file rahulrmahalekey.asc.
gpg --import rahulrmahale.asc
All Linux distribution sites have their own public keys available for download. You should, for example, download the Red Hat public key, which can be accessed from the Red Hat site on its security resources page (redhat.com). Click the Public Encryption Key link. From there, you can access a page that displays just the public key. You can save this page as a file and use that file to import the Red Hat public key to your keyring. (A Red Hat distribution also places the Red Hat public key in the /usr/share/doc/rpm4-1 directory with versions for both GPG and PGP encryption, RPM-GPG-KEY and RPM-PGP-KEY files.) In the following example, the user saved the page showing just the Red Hat public key as myredhat.asc, and then imported that file:
gpg --import myredhat.asc
Validating Keys
To manually check that a public key file was not modified in transit, you can check its fingerprint. This is a hash value generated from the contents of the key, much like a modification digest. Using the --fingerprint option, you can generate a hash value from the key you installed, and then contact the sender and ask them what the hash value should really be. If they are not the same, you know the key was tampered with in transit.
gpg --fingerprint rahulrmahale@yahoo
You do not have to check the fingerprint to have gpg operate. This is just an advisable precaution you can perform on your own. The point is that you need to be confident that the key you received is valid. Normally you can accept most keys from public servers or known sites as valid, though it is easy to check their posted fingerprints. Once assured of the key’s validity, you can then sign it with your private key. Signing a key notifies gpg that you officially accept the key. To sign a key, you use the gpg command with the --sign-key command and the key’s name.
gpg --sign-key rahulrmahale@yahoo
Alternatively, you can edit the key with the --edit-key command to start an interactive session in which you can enter the command sign to sign the key and save to save the change. Signing a key involves accessing your private key, so you will be prompted for your passphrase. When you are finished, leave the interactive session with the quit command. Normally, you will want to post a version of your public key that has been signed by one or more users. You can do the same for other users. Signing a public key provides a way to vouch for the validity of a key. It indicates that someone has already checked it out. Many different users can sign the same public key. Once you have received and verified a key from another user, you can sign and return the signed version to that user. After you sign the key, you can generate a file containing the signed public version. You can then send this file to the user. This process builds a Web of Trust, where many users vouch for the validity of public keys.
gpg -a --export rahulrmahale@yahoo –output rahulrmahalesig.asc
The user then imports the signed key and exports it to a keyserver.
Using GnuPG
GnuPG encryption is currently supported by most mail clients, including Kmail, Thunderbird, and Evolution. You can also use the GNU Privacy Assistant (GPA), a graphical user interface (GUI) front end, to manage GPG tasks, or you can use the gpg command to manually encode and decode messages, including digital signatures, if you wish. As you perform GPG tasks, you will need to reference the keys you have using their key names. Bear in mind that you need only a unique identifying substring to select the key you want. GPG performs a pattern search on the string you specify as the key name in any given command. If the string matches more than one key, all those matching will be selected. In the following example, the “Sendmail” string selects matches on the identities of two keys.
# gpg --list-keys "Sendmail"
pub 1024R/CC374F2D 2000-12-14
Sendmail Signing Key/2001 <sendmail@Sendmail.ORG>
pub 1024R/E35C5635 1999-12-13
Sendmail Signing Key/2000 <sendmail@Sendmail.ORG>
Encrypting Messages
The gpg command provides several options for managing secure messages. The e option encrypts messages, the a option generates an armored text version, and the s option adds a digital signature. You will need to specify the recipient’s public key, which you should already have imported into your pubring file. It is this key that is used to encrypt the message. The recipient will then be able to decode the message with their private key. Use the --recipient or -r option to specify the name of the recipient key. You can use any unique substring in the user’s public key name. The email address usually suffices. You use the d option to decode received messages. In the following example, the user encrypts (e) and signs (s) a file generated in armored text format (a). The -r option indicates the recipient for the message (whose public key is used to encrypt the message).
gpg -e -s -a -o myfile.asc -r rahulrmahale@yahoo.com myfile
# mail rahulrmahale@yahoo.com < myfile.asc
You can leave out the ASCII armor option if you want to send or transfer the file as a binary attachment. Without the --armor or -a option, gpg generates an encoded binary 0file, not an encoded text file. A binary file can be transmitted through email only as an attachment. As noted previously, ASCII armored versions usually have an extension of .asc, whereas binary version use .gpg.
Decrypting Messages
When the other user receives the file, they can save it to a file named something like myfile.asc and then decode the file with the -d option. The -o option will specify a file to save the decoded version in. GPG will automatically determine if it is a binary file or an ASCII armored version.
gpg -d -o myfile.txt myfile.asc
To check the digital signature of the file, you use the gpg command with the –verify option. This assumes that the sender has signed the file.
gpg --verify myfile.asc


